
To make authentic Italian rainbow cookies, start by creaming together butter and sugar, then add eggs and almond extract. Divide the batter into three and tint each with food coloring. Spread the layers in lined pans and bake. Once cooled, stack them with jam in between. Dip the bottoms in melted chocolate for a delicious coating. Refrigerate to set, and drizzle more chocolate on top for flair. Keep going to unveil even more tips and tricks!
Key Takeaways
- Start by creaming unsalted butter and granulated sugar, then add eggs and almond extract to create a flavorful batter.
- Divide the batter into three portions and tint each with red, yellow, and green food coloring for vibrant layers.
- Bake each colored layer in lined pans at 350°F (175°C) for 10-12 minutes, then cool completely.
- Layer the cooled cookie sheets with apricot or raspberry jam, stacking them in alternating colors before wrapping and refrigerating.
- Dip the bottom of each assembled cookie in melted chocolate, letting excess drip off, and drizzle more chocolate on top for decoration.
Ingredients You’ll Need
To make delicious rainbow cookies, you’ll need a handful of essential ingredients. Start with almond paste, which gives the cookies their signature flavor and moist texture.
You’ll also need granulated sugar, eggs, and unsalted butter to create the perfect base. For the dry ingredients, grab all-purpose flour and baking powder. Additionally, using a fertilizer spreader can help evenly distribute any garden amendments you might need while baking.
Don’t forget the food coloring; you’ll want red, yellow, and green to achieve those vibrant layers. Vanilla extract adds a lovely aroma, while a pinch of salt balances the sweetness.
Lastly, consider using apricot or raspberry jam to layer between the cookie sheets, enhancing both flavor and moisture. Additionally, using a body lotion suited for your skin type will keep your hands moisturized as you bake. Gather these ingredients, and you’ll be ready to create your colorful and delightful rainbow cookies!
Preparing the Batter
Begin by preheating your oven to 350°F (175°C) to ensure it’s ready when your batter is complete.
Next, in a large mixing bowl, cream together your softened butter and sugar until light and fluffy.
Add in the eggs, one at a time, mixing well after each addition.
Then, gently fold in the almond extract and the flour, ensuring everything’s well combined.
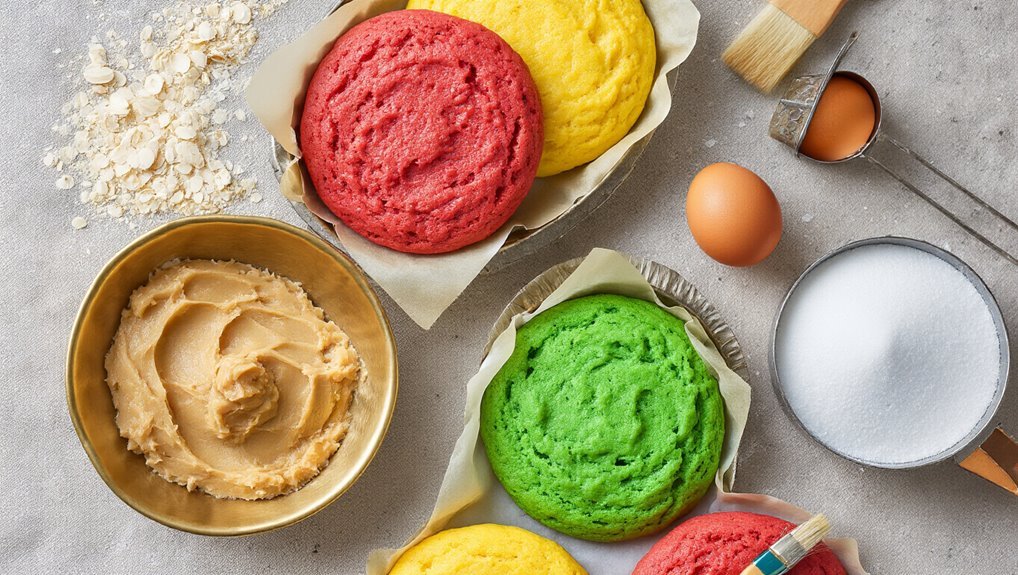
Divide the batter into three equal portions.
To create the classic rainbow colors, tint each portion with food coloring—red, green, and yellow.
Mix until you achieve your desired shades.
Make sure there are no streaks left in the batter. Additionally, using the right garden trowels can help you maintain your garden, providing the perfect backdrop for showcasing these delicious cookies. The right essential gardening tools can also enhance your overall gardening experience.
Finally, you’re ready for the next step, where you’ll pour the batter into prepared pans for baking.
Baking the Layers
Once you’ve colored your batter, it’s time to bake the layers. Preheat your oven to 350°F (175°C) and line your baking pans with parchment paper. Divide your batter into three separate bowls, each colored differently. Spread the first layer evenly into the prepared pan, then bake for about 10-12 minutes or until the edges begin to brown. Repeat this process for the other two colors. Remember to use essential pruning shears when trimming any excess parchment paper for a clean edge.
| Layer Color | Baking Time | Notes |
|---|---|---|
| Green | 10-12 mins | Ensure even spread |
| Yellow | 10-12 mins | Check for a golden edge |
| Red | 10-12 mins | Allow to cool before removal |
Once baked, let the layers cool completely in the pans before moving on to the next steps.
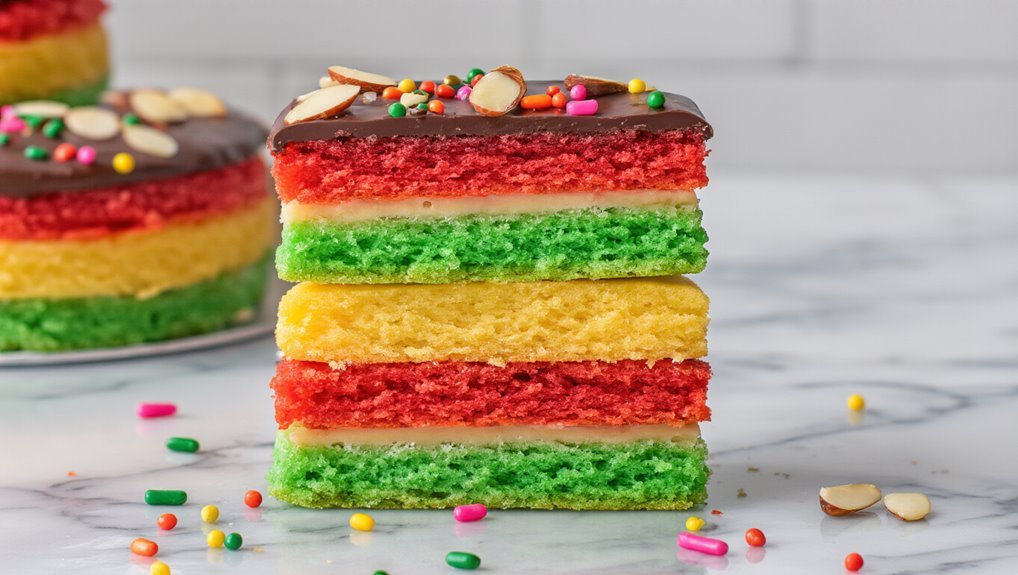
Assembling the Cookies
As you gather your cooled layers, it’s time to bring your rainbow cookies to life. Start by carefully stacking the layers, making sure the colors alternate beautifully.
Here’s how to assemble them perfectly:
- Spread a Layer of Jam: Use apricot or raspberry jam on the bottom layer. This adds a delightful flavor and helps keep everything together.
- Stack the Layers: Gently place the second layer on top of the jammed layer, repeating the process with the third layer. Press them down lightly to ensure they stick.
- Wrap and Chill: Once stacked, wrap the layers in plastic wrap and refrigerate for a few hours. This helps the flavors meld and solidifies your cookie structure.
Now you’re ready for the next step!
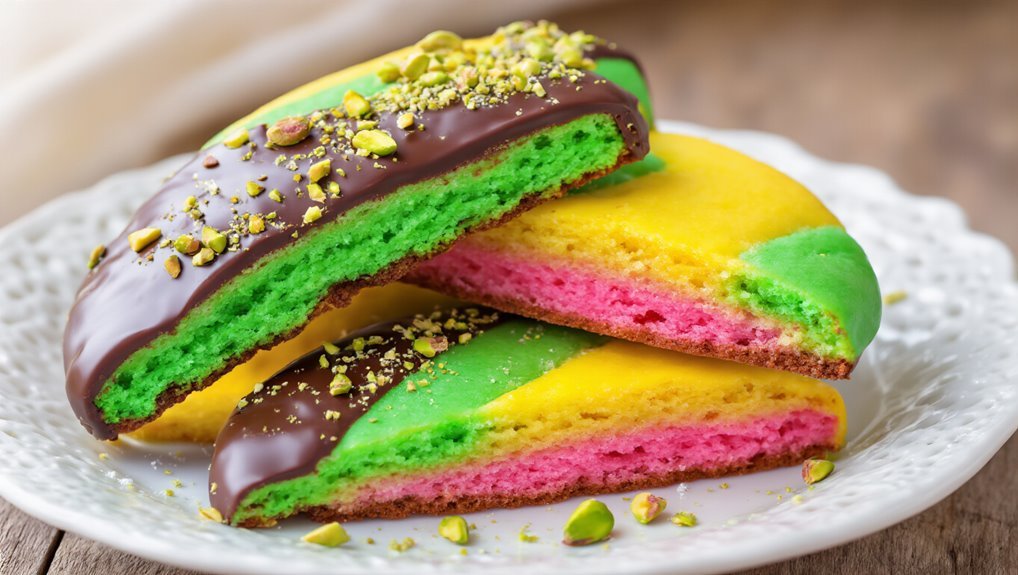
Coating With Chocolate
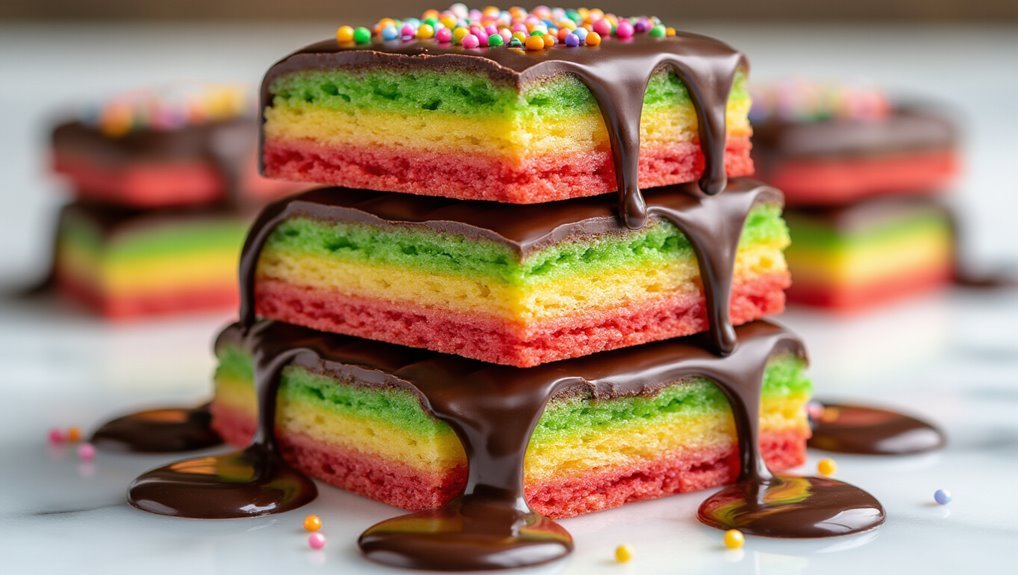
Coating your rainbow cookies with chocolate adds a rich finish that perfectly complements the fruity layers.
To start, melt high-quality chocolate—dark, milk, or a mix—over low heat, stirring until smooth. Once melted, let it cool slightly to avoid melting the cookie layers.
Carefully dip the bottom of each cookie into the chocolate, ensuring an even coating. Use a fork to lift them out, allowing excess chocolate to drip off. Place the cookies on a parchment-lined tray.
For an extra touch, drizzle or spread more melted chocolate on top. Let the chocolate set at room temperature or speed up the process by placing them in the fridge.
This chocolate coating not only enhances flavor but also adds a beautiful finish to your cookies.
Storing and Serving Tips
To keep your rainbow cookies fresh and delicious, store them in an airtight container at room temperature for up to a week.
If you want to maintain their vibrant colors and flavors, follow these serving tips:
- Slice Before Serving: Cut the cookies into small rectangles for easy serving and to showcase their beautiful layers.
- Pair with Coffee or Tea: These cookies pair wonderfully with a cup of coffee or tea, enhancing their rich almond flavor.
- Chill for Extra Enjoyment: For a refreshing twist, try chilling the cookies in the fridge before serving—they’ll be even more delightful!
Frequently Asked Questions
Can I Use Almond Extract Instead of Vanilla Extract?
You can definitely use almond extract instead of vanilla extract! It’ll give your dish a unique flavor. Just remember, almond extract is stronger, so you might want to use less than the vanilla amount. Enjoy experimenting!
How Do I Achieve the Perfect Cookie Thickness?
To achieve the perfect cookie thickness, you’ll want to measure your ingredients accurately, chill the dough before baking, and avoid overmixing. Experiment with baking times to find that sweet spot for your desired texture.
Can I Freeze the Cookies After Baking?
Yes, you can freeze the cookies after baking! Just make sure they cool completely, then wrap them tightly in plastic wrap or foil. This way, they’ll stay fresh and delicious for future enjoyment.
What Is the History Behind Rainbow Cookies?
Rainbow cookies, originating from Italian-American communities, celebrate cultural heritage. They’ve become a beloved treat, symbolizing festive occasions and family gatherings. You’ll find their vibrant colors and rich flavors evoke nostalgia and warmth among many.
Are There Gluten-Free Alternatives for This Recipe?
Yes, there are gluten-free alternatives for this recipe. You can use almond flour or a gluten-free all-purpose flour blend. Just ensure your other ingredients, like jam and chocolate, are also gluten-free to maintain authenticity.
Conclusion
Now that you’ve mastered the art of making authentic Italian rainbow cookies, remember that these colorful treats are more than just a dessert; they symbolize celebration and joy in Italian culture. Some believe their vibrant layers represent the diversity of Italian heritage. As you enjoy your cookies, think about the stories they carry and the traditions they honor. Whether shared at gatherings or savored alone, these cookies are a delicious bridge to Italy’s rich culinary history.