
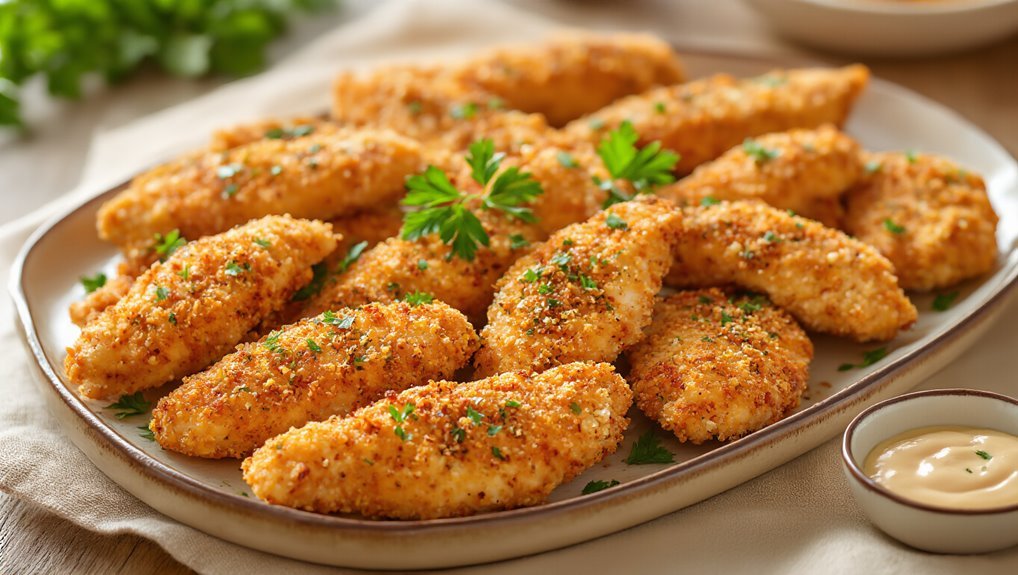
For the crispiest oven-baked chicken tenders, start with boneless, skinless chicken breasts. Coat them in a seasoned flour mixture, dip in frothy eggs, then press into a mix of panko breadcrumbs for that extra crunch. Bake at 425°F for 15-20 minutes, flipping halfway for even crispiness. Don’t forget to space them out on the baking sheet and use a light spray of cooking oil for a golden finish. Keep going to uncover more tips and tricks!
Key Takeaways
- Use boneless, skinless chicken breasts and trim excess fat for a tender and clean presentation.
- Combine flour with garlic powder, onion powder, paprika, salt, and pepper for a flavorful coating.
- Dredge chicken in seasoned flour, dip in beaten eggs, and press into panko breadcrumbs for extra crunch.
- Bake at 425°F (220°C) on a lined baking sheet, flipping halfway for even cooking.
- Space tenders apart to prevent steaming and lightly spray with cooking spray for a golden finish.
Ingredients You’ll Need

To whip up delicious oven-baked chicken tenders, you’ll need a few key ingredients that pack plenty of flavor. Start with boneless, skinless chicken breasts, as they’re tender and cook evenly.
For the coating, grab some all-purpose flour, which helps create that crispy texture. You’ll also want breadcrumbs—panko works best for an extra crunch. Achieving the perfect texture can be enhanced by using a high end sous vide machine to ensure the chicken stays juicy before baking.
Don’t forget the seasoning! A mix of garlic powder, onion powder, paprika, salt, and pepper elevates the taste. For binding, use eggs to help the coating stick.
Finally, a drizzle of olive oil adds richness and helps achieve a golden finish. With these ingredients on hand, you’re ready to create chicken tenders that’ll impress everyone at the dinner table! For even crispier results, try using a premium stainless steel skillet to bake your chicken tenders for maximum crunch.
Preparing the Chicken
Once you have your ingredients ready, it’s time to prepare the chicken. Start by rinsing the chicken tenders under cold water, which helps to remove any unwanted residues. Pat them dry with paper towels; this step is crucial for achieving that crispy texture later. Next, trim any excess fat or gristle for a cleaner presentation. If you prefer smaller pieces, feel free to cut the tenders into bite-sized portions.
Place the chicken in a bowl and season it lightly with salt and pepper to enhance the flavor. Allow the chicken to marinate for at least 15 minutes if you have time; this helps the seasoning penetrate. For an even more efficient prep process, consider using a high end kitchen stand mixer to mix your seasonings and marinades thoroughly before coating the chicken. Using a high end stand mixer can make your kitchen tasks easier and ensure even mixing of ingredients.
Now you’re all set to move on to the next step!
Making the Coating
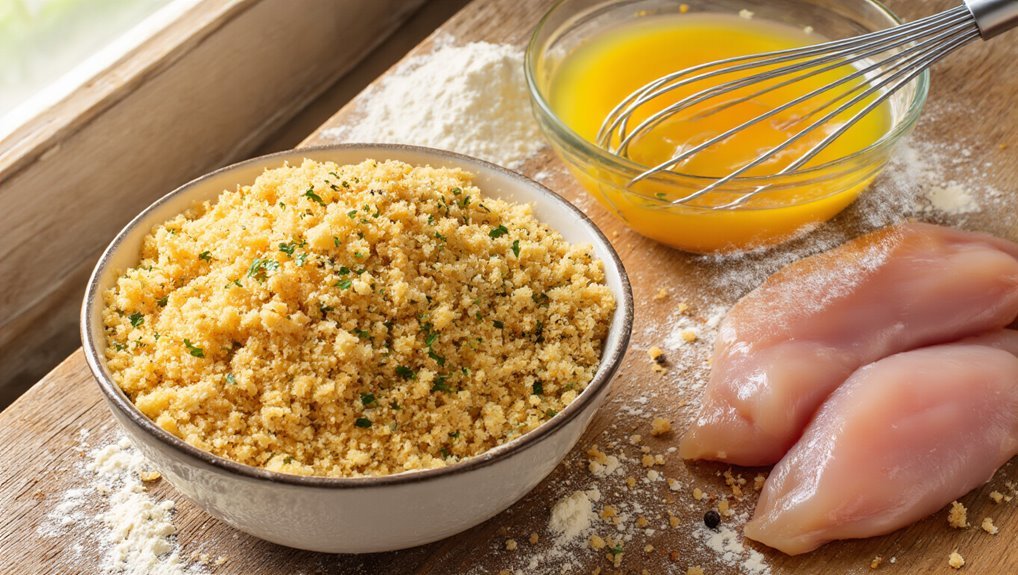
As you prepare to make the coating, gather your ingredients and set up a workstation to streamline the process. You’ll need breadcrumbs, flour, and a mix of spices like paprika, garlic powder, and salt. For those looking to upgrade their kitchen tools, investing in a premium slow cooker can enhance your culinary repertoire beyond just chicken tenders.
In one bowl, combine the flour with your chosen spices. In another, beat a couple of eggs until frothy. Next, place the breadcrumbs in a third bowl.
To coat the chicken tenders, first dredge each piece in the seasoned flour, shaking off any excess. Then, dip it into the egg mixture, allowing any surplus to drip off.
Finally, press the tender into the breadcrumbs, ensuring it’s fully coated. This triple-layer coating will give your tenders that irresistible crunch once baked. Enjoy the process!
For more effortless and flavorful cooking, consider exploring the benefits of high end slow cookers to elevate your kitchen creations even further.
Baking the Chicken Tenders
Baking chicken tenders is a straightforward process that yields delicious results. Preheat your oven to 425°F (220°C) and line a baking sheet with parchment paper for easy cleanup. Arrange your coated chicken tenders in a single layer, ensuring they don’t touch. Bake for 15-20 minutes, flipping halfway through for even cooking.
Here’s a quick guide to help you remember important steps:
| Step | Action |
|---|---|
| Preheat | 425°F (220°C) |
| Prepare Sheet | Line with parchment paper |
| Arrange Tenders | Single layer, no touching |
| Bake Time | 15-20 minutes |
| Flip | Halfway through cooking |
Enjoy the aroma filling your kitchen as they bake to perfection! For even more gourmet results, consider using a high end rotisserie oven to achieve extra crispy and juicy chicken tenders. With a luxury rotisserie oven, you can elevate your home cooking to restaurant-quality standards.
Tips for Perfectly Crispy Tenders
To achieve perfectly crispy chicken tenders, start by ensuring your coating is light and even.
Use a mix of breadcrumbs and panko for that extra crunch. Before dipping the chicken, coat it in flour, then dip in beaten eggs, and finally roll it in your breadcrumb mixture. This triple-layer process locks in moisture while providing a crisp shell.
Make sure your tenders are spaced out on the baking sheet; overcrowding can lead to steaming instead of crisping. Preheat your oven thoroughly and consider using a wire rack on top of the baking sheet to allow air circulation.
Finally, spray the tenders lightly with cooking spray before baking for an added golden finish. Enjoy the crunch!
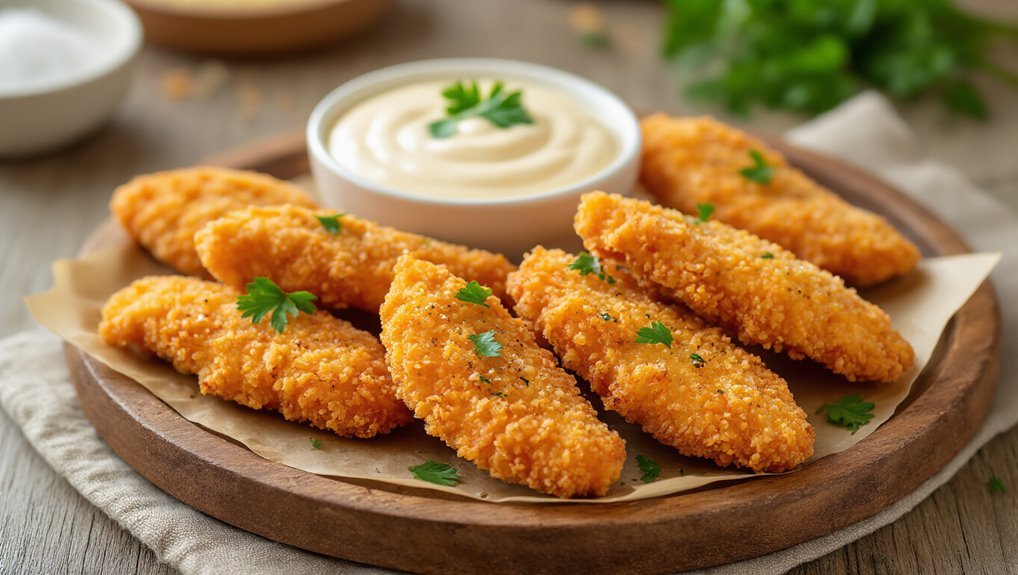
Serving Suggestions
When it comes to serving your crispy chicken tenders, consider pairing them with a variety of dips and sides for a complete meal. Here are some delicious options to elevate your dining experience:
| Dips | Sides | Drinks |
|---|---|---|
| Honey Mustard | French Fries | Lemonade |
| BBQ Sauce | Coleslaw | Iced Tea |
| Ranch Dressing | Steamed Broccoli | Sparkling Water |
| Buffalo Sauce | Mac and Cheese | Soft Drinks |
These combinations not only enhance the flavor but also add color and nutrition to your plate. Enjoy your tenders with a refreshing drink, and don’t forget to set the table for a fun, casual dining experience!
Storage and Reheating Instructions
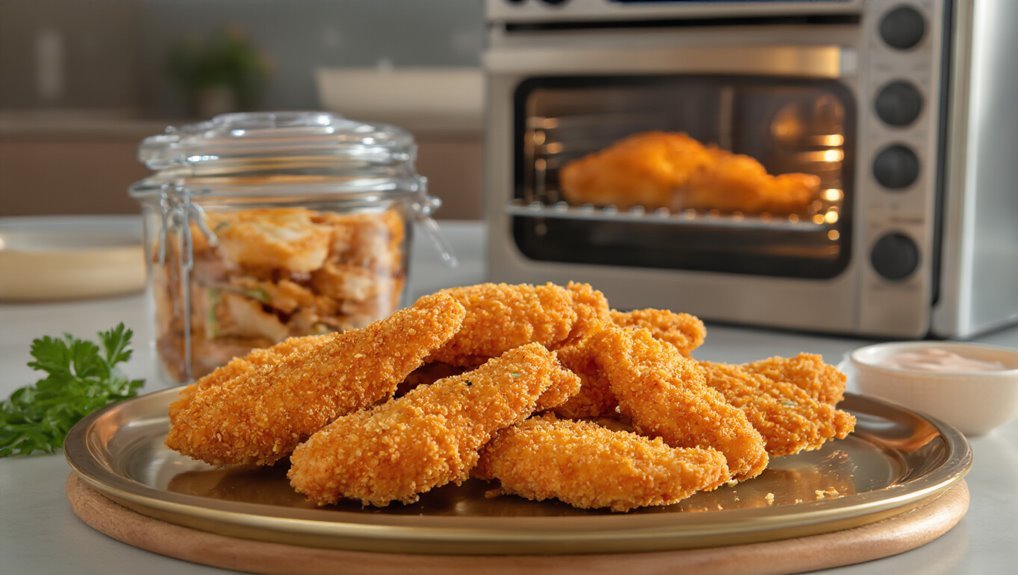
Once your delicious oven-baked chicken tenders are ready, it’s important to store them properly to maintain their crispiness and flavor. Let them cool completely before transferring them to an airtight container. This helps prevent moisture buildup, which can make them soggy.
Here’s how to store and reheat them effectively:
- Refrigerate: Keep them in the fridge for up to 3 days.
- Freeze: For longer storage, freeze them in a single layer, then transfer to a freezer-safe bag for up to 2 months.
- Reheat in the Oven: Preheat your oven to 400°F (200°C) and bake for 10-15 minutes until heated through and crispy.
- Avoid Microwave: It can make them rubbery, so stick with the oven for best results.
Frequently Asked Questions
Can I Use Frozen Chicken Tenders Instead of Fresh?
Yes, you can use frozen chicken tenders instead of fresh. Just be sure to adjust your cooking time. Thawing them beforehand might help achieve a better texture and ensure even cooking for your meal.
What Dipping Sauces Pair Well With Chicken Tenders?
When it comes to chicken tenders, you can’t go wrong with classic choices. Try honey mustard, barbecue, ranch, or buffalo sauce for a flavorful kick. Experiment and find your perfect pairing that’ll elevate your meal!
How Do I Make Chicken Tenders Gluten-Free?
To make chicken tenders gluten-free, you’ll swap regular breadcrumbs for gluten-free ones, or use crushed cornflakes. Season them well, then bake until golden. You’ll enjoy crispy, tender bites without the gluten hassle!
Can I Bake Chicken Tenders in an Air Fryer?
Yes, you can bake chicken tenders in an air fryer! Simply preheat the air fryer, season your tenders, and cook them until they’re golden and crispy. Enjoy a healthier, delicious alternative to traditional frying.
What Side Dishes Complement Oven-Baked Chicken Tenders?
When you’re craving something crispy, consider pairing oven-baked chicken tenders with classic sides like coleslaw, mac and cheese, or sweet potato fries. They’ll elevate your meal and make your taste buds dance with joy!
Conclusion
You’ve transformed simple ingredients into a crunchy delight that rivals any fried version. While deep-fried tenders may tempt you with their golden allure, your oven-baked creation brings a guilt-free twist to a classic favorite. With each bite, you’ll savor the perfect balance of crispy and juicy, proving that healthier can be just as satisfying. So, whether you’re serving them up for a family dinner or a late-night snack, these tenders are sure to steal the show!


